 |
| The Artisan Bread School 2010 |
My culinary adventure with dough started in October 2010 when I took my first lesson (since nurse anesthesia school), a course in artisan breads at the
Artisan Bread School.
Carl Shavitz, a self-taught baker and brilliant instructor, bakes for restaurants in the UK and holds week-long classes in England, Italy and the US. With both my husband's and Carl's encouragement, I had my sights set on the Le Panyol since he thought it was the best bread oven on the market. Kevin agreed that I would get a lot of enjoyment from the wood-fire oven since baking, cooking, as well as entertaining guests are activities I thoroughly enjoy.
 |
| My new flame: Le Panyol 83 |
Fast forward two years, and I ordered my oven in June 2012. It took me four months to find a qualified masonry person who was willing to do a task as small as mine. Since its arrival in October, I'd been scouring the Internet, reading as much as I could about how to use my new toy. Needless to say, it didn't come with instructions. Along with the 2,400 pound crate, it arrived with a manila envelope that included the state requirements proclaiming the materials made were "safe for human use", and a 15-minute video of how to start a fire in the oven. Instructions on how to actually use the wood-fire oven must have gotten lost in the mail!
 |
| Overnight Dough with 70% Hydration |
There are not that many wood-fire oven books on the market. Some of the ones that are out there have have well written oven-management instructions, but the recipes included just do
not sound appetizing. The books written by chefs have recipes that sounds more appealing; while I have not tried every recipe in the book, I have cooked many meals and eaten great meals in restaurants to know if the recipe reads flavorful!
With much experimentation and night time reading, I roasted, baked, sautéed, and braised meals for three months. Since June 2012, I've added five wood-fire oven books to my culinary library collection. I've baked pizza, roasted meats (whole chicken, pork chops, sausages) roasted vegetables (fennel, parsnips, red potatoes), and baked artisan breads (sourdoughs). Somehow, I end up overcooking either the vegetables or the meat. I found myself cooking the last batch of bread using a flashlight. Rather than waste time and money in overcooking meals and wondering if I'm using heat optimally, I decided to enroll in a wood-fire oven class.
I've known about
The Stone Turtle Baking and Cooking School for several years now, and decided to pay them a visit!
NOTE: The rest of the blog talks about my experience at a wood-fire oven course. This blog post goes out to those who are interested in having a wood fire oven in their back yard, are in the process of building one, or enthusiast owners like myself who are in a similar predicament as I am, wondering if what you're doing is the best practice!
 |
| School Mascot |
The Stone Turtle Baking and Cooking School offers the wood-fire intensive class twice a year. It is a two-day course that focuses on oven management. The school is located in Lyman, ME, about 30 minutes south of Portland, ME.
Michael Jubinsky is the master baker and course instructor who has 45 years experience in the baking industry. With lots of baking experience, and instructional hours, he is very enthusiastic about his love for baking and sharing his knowledge.
 |
| In Remembrance |
He shares his love for baking with his wife, Sandy, who is a talented artist in her own right. She painted the turtles on both sides of the oven foundation as well as a portrait of Babchi, Michael's grandmother. Thanks to Babchi, she is the reason we met here; she's the woman responsible for introducing Michael to cooking, and fueling his passion for baking and cooking so that he can teach others.
 |
| Hall and Shelly learning the basics |
Day 1:
Introductions/background
Class experiences varied from folks who already own an oven (built or purchased), who wanted to learn oven management, are in the process of buying one to have a wood-fire oven business, or wanting to expand their cooking and baking abilities with the wood-fire oven. Ultimately, everyone wanted to learn oven-management techniques
 |
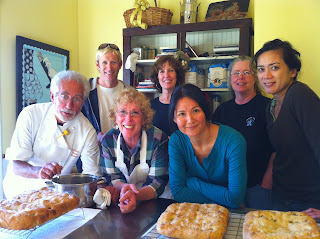
| Anesthetist, Principal, Store Owner, Bakers, Doc |
Building a Fire
Step by step, Michael walked us through the steps of starting a fire. From stacking wood properly to managing a burning stack of wood until it died to ruby red embers, he explained the importance of the techniques that work for him.
 |
| "The Sandy Technique" |
Cooking & Baking
 |
| Separate the colors, who knew?! |
Cooked mussels in a rich garlic broth in a stainless steel pan wok and roasted chicken meat in a pair of preheated skillets. One portion was flavored with Morrocan spices (cumin, cinnamon, coriander) and the other with Italian herbs. He prefers to use dark meat, boneless thighs which are marinated overnight. The chicken would later be used for pizza toppings. Not only did the class learn to properly stack wood to effectively start a fire, we learned to roast peppers properly. The peppers need to be moderately charred, more than what I'm used to doing in the past. I learned to separate the green peppers from the yellow and red which have more sugars, and therefore, cooks (and burns) quicker. I love to roast peppers and drizzle them with a balsamic vinegar glaze!
 |
| Piping Hot Pita Breads |
Next, we shaped dough for pita bread, which must be shaped with a slight thickness in order to get the puffy rise in the end. If spread too thin, it will not puff up and will look like a pizza dough. If too thin, it will be a different name, a naan! Shaping dough for pizza was a lot of fun. I got to practice the techniques I learned from
Giulio Adriani in January. Michael demonstrated making granola. An endless combination of fruits and nuts can be mixed, but the trick I learned is to add the dried fruit immediately after the nut mixture is out of the hot oven. With teamwork, we made enough poolish for the next day's exercise making French batards. He explained the difference between poolish, biga and a starter. After his demonstration, we all had the opportunity to shape dough for cinnamon rolls.
One advantage of taking lessons from a master baker like Michael is that he gave us knowledge that took him six years to learn, (i.e., what types of skillet pans work best, which oven gloves keeps your hands the safest.) I really appreciated his openness in sharing with us his words of wisdom!
Day 2:
Breakfast:
Enjoyed a bounty of breakfast treats from the oven: yogurt with granola and fresh fruit, cinnamon rolls, and piping hot coffee!
Our Turn to Play:
Today, it was our turn to start the fire! It was teamwork. David assembled the wood around the edge of the oven, like a jigsaw puzzle. Each wood overlapped one another, ensuring that there was enough of a gap for air flow. Hall and I started the wood lattice in front of the oven opening, starting with large pieces of wood to medium-to-small pieces of wood, and added kindling which was lit and pushed between the large pieces of wood. After about 5 minutes, once the lattice woodwork caught on fire, Teagan pushed the entire pile of wood towards the far back. The building of fire is no big secret. It is quite similar to starting a fire in your fire place. Although after today, everyone will develop their own technique.
 |
| Preheating the skillets |
Using the poolish made the previous day, we made French batards from start to finish. Not having baked bread for almost a year, it was nice to be playing with dough once again. Hoping this class will be an impetus to get back to baking breads and pizza! I understand the temperatures back home was in the 70s, while it ranged from 36-49 degrees here in Portland ME. Needless to say, it was a lot easier staying indoor most of the day with the cold weather.
 |
| Foolishness with Poolish |
Michael demonstrated making the puff pastry which would be used to make apple tartine. Having made laminated dough for croissants, I appreciated his patience in rolling all that butter into the dough. I was exhausted just watching him but I truly appreciated his efforts once I got a bite into the delicious pastry he made for dessert!
 |
| Making breakfast |
Ultimately, the class was meant for us to learn and understand oven management. In doing so, we got to cook wonderful breads, pizza, and vegetables along the way in order to use the oven in various temperatures. During the higher temperatures (700-800 degrees), the vegetables were roasted (asparagus and red potatoes) and we cooked pizza. In the 600-700 range, chicken and mussels were sautéed. In the 400-500 degree range, we baked 22 French batards. Taking advantage of the cooking temperatures, a citrus herbed and Greek herb infused lamb roast was prepared, and for dessert, a beautifully caramelized apple tartine.
 |
| Simple Pleasures in Life |
Lessons Learned:
The class was a success for everyone! We all came away with more knowledge about the oven, great recipes, and tools. For me, I have learned to be more patient with my oven and with myself! I need to spread out my cooking and baking over several days and not try to do it all in one day!
I think this intensive course is geared for the beginner who is thinking about getting a wood fire oven or someone who is going to get one and would need instructions on how to use it. After this class, I definitely feel more confident as a wood-fire oven owner and with organization, patience, and more practice, my family and friends will be great benefactors of wonderful foods from my hearth.
 |
| Ready to Peel |
Personally, Michael gave me the answers I needed that the oven distributor did not provide. I feel as though Michael truly is an ambassador to the Le Panyol product as well as to all other wood-fire ovens in general. His 45 years of experience in the baking industry, many years as an instructor, and most recently, as a wood-fire oven owner since 2006, show his passion in the craft of baking.
Thanks to his artistic and talented wife, Sandy and their illustrious helping staff of four, Michael was able to spend time answering our questions, offering bread-baking, pastry-making, and hearth-cooking advice throughout both days without missing a beat. And if he did miss a beat or two, Sandy was close by to lovingly remind him.
Books I Recommend:
Wood Fired Oven Cookbook (Holly and Davis Jones) The book is thorough. Section on Lighting and Controlling a Fire (with photographs); Menu Ideas and Timing Guides, Both from the UK, Holly is a chef and Davis, a trained baker...classic dishes, and all types of recipes (flavors of Greece, Britain, Morroco,etc..) that are easy to cook-all geared for the WFO. Recipes for Pizzas and Many Toppings, Fish and Seafood, Veggies Meat, Breads, Puddings and Cakes.
Wood-Fired Cooking: Techniques and Recipes for the Grill, Backyard Oven, Fire Place and Campfire (Mary Karlin) A good overview of cooking options for the home cook. She has a section on Wood Fire Basics, Developing a Cooking Plan and a chart of Hardwood and Fruitwoods (flavor profile, heat level, and coaling quality). Mary Karlin is also a chef - having taught at the Culinary Institute of America in Greystone, and other culinary schools.The recipes in the book are amazing. Chapters include Baking Flatbreads and Rustic Artisan Breads, Wood Fire Grilling, Campfire Cooking, Wood Fire Roasting, Claypot and Cast Iron oven cooking, savory tarts and galettes baked on the Hearth, Low and Slow: Braising to barbecue. The recipes are rustic, wholesome, and easy. She chooses to include recipes that takes advantage of the flavors that you'll only get from a WFO.
Seven Fires: Grilling the Argentine Way (Francis Mallman) He is a famous chef in South America - illustrating all the techniques of how food is cooked using fire. From a parrilla -cooking on a grill- similar to a Tuscan grill....to a clay oven, using embers and ashes, using an iron cross, to a cauldron. He explains how to build a fire in your back yard and cook elaborate meals - his recipes are South American-influenced (empanadas, ribeye with chimichurri,etc,) His meals are gourmet and elaborate, compared to the others, but the preparations are worthwhile.


 Giulio is very much an open book with his pizza making and a great ambassador to the craft. Giulio showed up at the Brooklyn pizzeria a few minutes after I did, looking more like a stylish model with a scarf around his neck, than a pizza maker. As a good instructor should do, Giulio was interested to find out the baseline with what he had to work with. I explained to him that I had been experimenting with pizza recipes since October up until the previous week, and ready to learn a new kind of pizza.


